Fix stubborn apps
Some problems you might encounter are:
- “Google Play Services not installed”
- Your app’s license check fails
- Map data of a navigation/map app is not shown (or a map within an app)
- The app does not behave as it should
Background
Some apps are quite stubborn when it comes to getting push notifications, showing map data, and/or license checking. Some apps known to misbehave are (to name some examples):
- Threema
- Google Maps
- Tractive GPS
- Element / Schildi-Chat
- Google Rewards
- …
They are not (just) checking if Google Play services is installed, but also checking if the app is linked to the Play Store (i.e. the exact package name com.android.vending).
For these apps you likely get a warning/popup telling you that they cannot find Google Play services, and/or they simply refuse to work, and/or do not show any map data, or (in the case of Threema/Element/SchildiChat) they activate their own push notification service, instead of using the one provided by Google Play/microG (which may use more battery or work less reliably compared to Google’s push service or UnifiedPush).
The solution is quite simple: the app has to be linked to the Play Store (i.e. opening app info, “App installed from…” should list “Google Play Store”, and not Aurora or F-Droid for example).
Possible solutions
Pro flavor (or Magisk manually installed)
- Uninstall the app and install it directly from the Google Play Store
- Backup the app with Neo Backup, then in Neo Backup settings
Service -> "The installer package name"set the name tocom.android.vending, then simply restore the previously backed up app.
Once done, check the app info screen again. It should show “App installed from Google Play Store”.
If you use e.g. Aurora Store to keep your apps updated, ensure you blacklist these apps there so they do not stop working after an update, or follow the Neo Backup steps above to restore them afterwards.
Last but not least, check the relevant topic in the AXP.OS FAQ.
Slim flavor
Due to the absence of root in the new Slim flavor, a different solution is in the works (details).
Intercepting App installation check
Based on #53 an experimental option is available for
- Android 11
- Android 13 (coming soon)
This option has some drawbacks when enabled:
- every app that gets installed will be marked persistently as installed by
com.android.vendingwhich is either Google Play Store or the microG Companion App (aka FakeStore), depending on the AXP.OS flavor - a reboot is required to make a newly installed/updated app work (again)
- as the change is persistent, the only way to unmark an app as installed from
com.android.vendingis either using a 3rd party tool which can change the installation source (e.g. Neo Backup on the Pro flavor), or without any 3rd party tools like this:- uninstall the app
- disable the installation check toggle in developer options
- install it again
- Note: changing packages.xml manually requires root/TWRP access and can easily break things up to a phone brick if you are not careful
- when using microG Companion App / FakeStore: some apps cause an app crash of the Companion App. Just ignoring it is usually enough.
We will continuously look into solving/improving the above and hopefully get a better solution one day.
Developer hint: App crash of the Companion App
E AndroidRuntime: java.lang.RuntimeException: Unable to bind to service com.android.vending.licensing.LicensingService@ca218e4 with Intent { act=com.android.vending.licensing.ILicensingService pkg=com.android.vending }: java.lang.SecurityException: Permission Denial: opening provider org.microg.gms.settings.SettingsProvider from ProcessRecord{621a62a 3113:com.android.vending/u0a94} (pid=3113, uid=10094) requires com.google.android.gms.permission.READ_SETTINGS or com.google.android.gms.permission.WRITE_SETTINGScaused by: this
Enabling installation interception
- Enable Developer Options
- Scroll down to near the bottom and enable
Intercept App installation check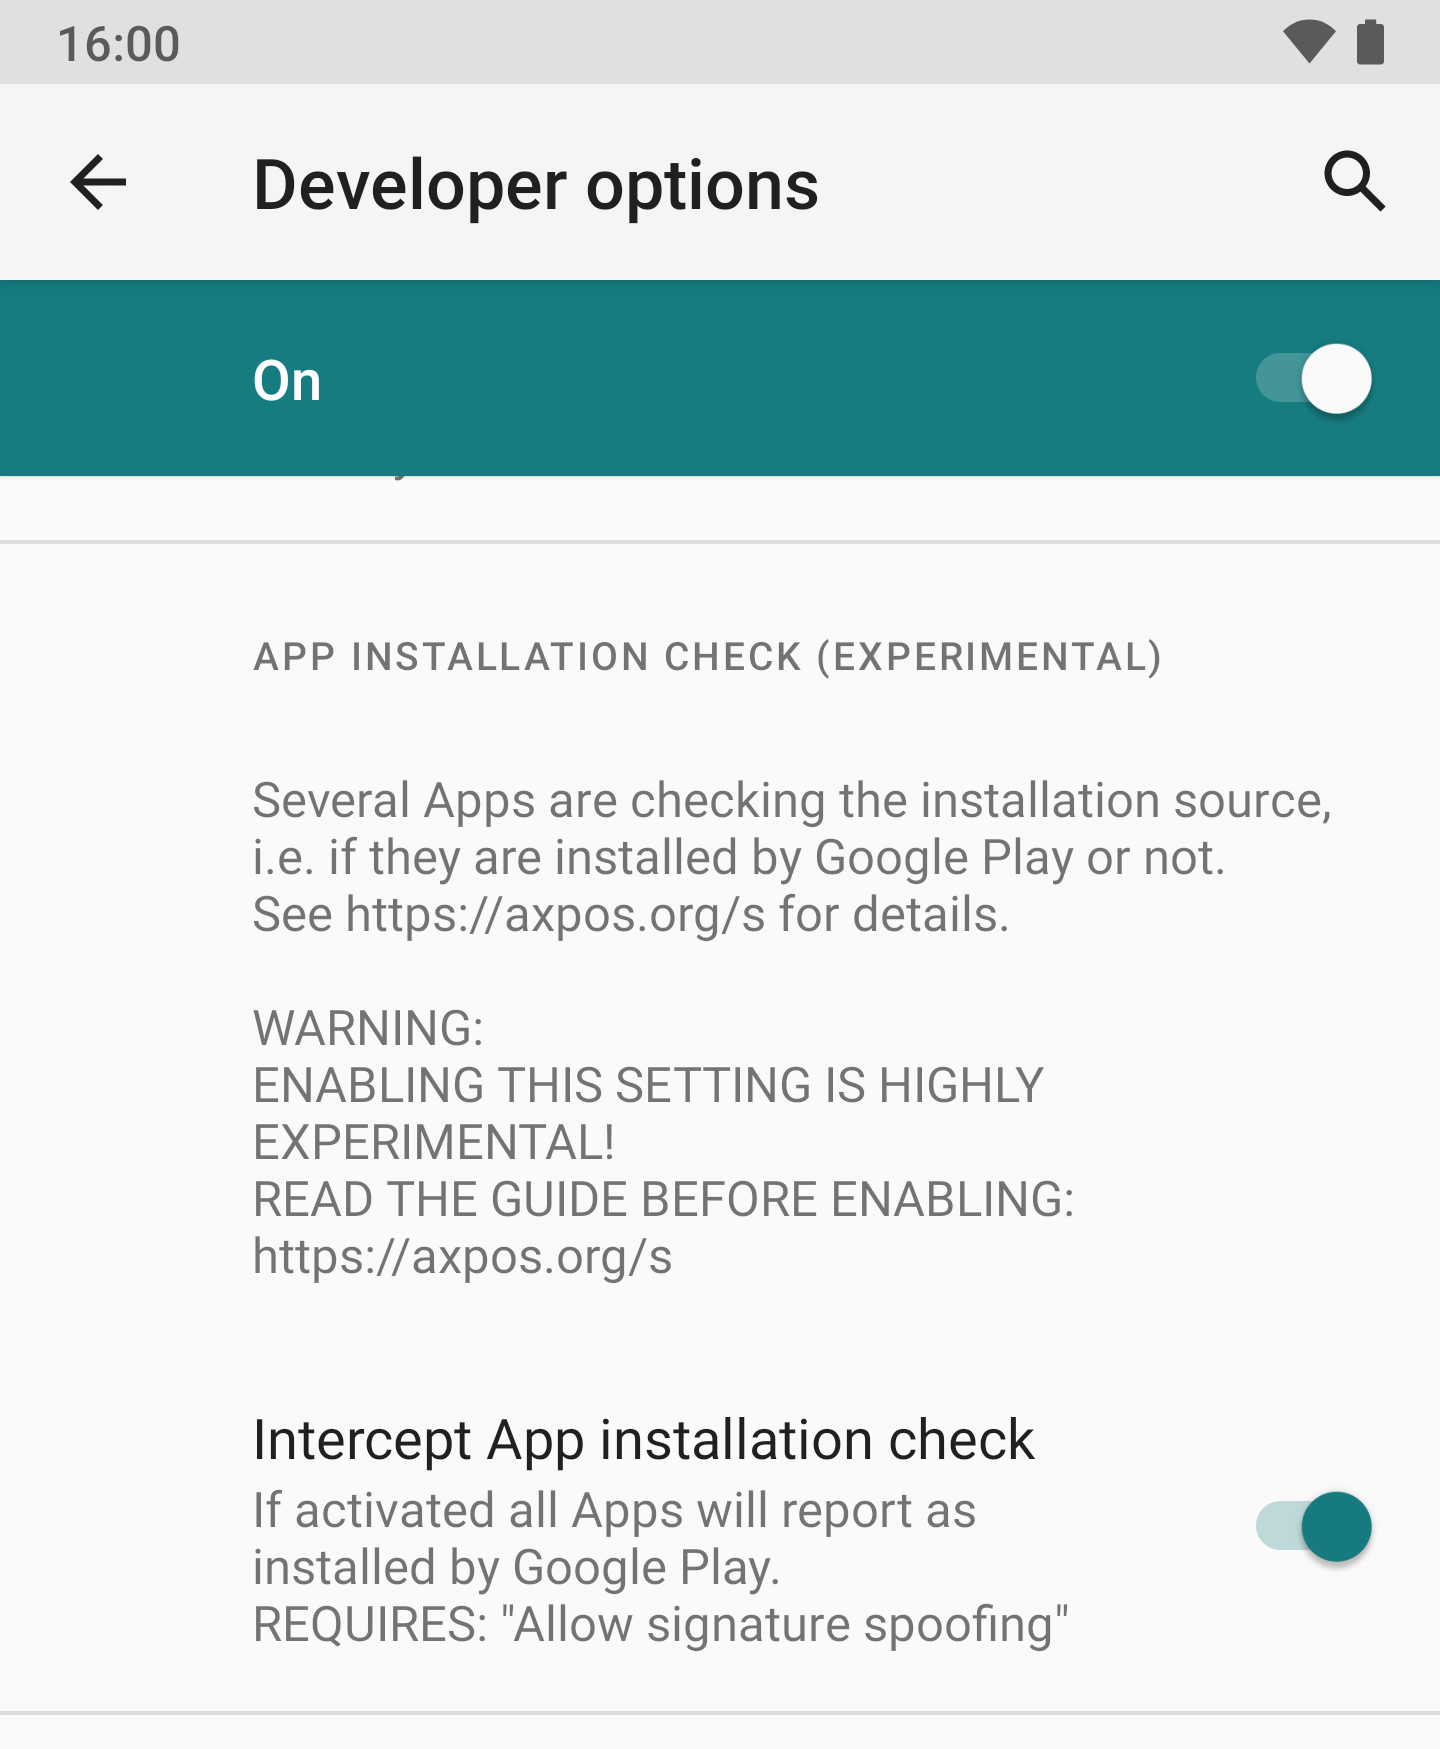
- Scroll down and enable
Allow signature spoofing(which is part of the next step, but while you are here, do it now) - Fully setup microG: go through the whole guide
- Assuming the microG Self-Check has no empty boxes, re-install any problematic apps
- Reboot(!)
- Enjoy
Note: keep in mind that any app update will require one reboot after installing.